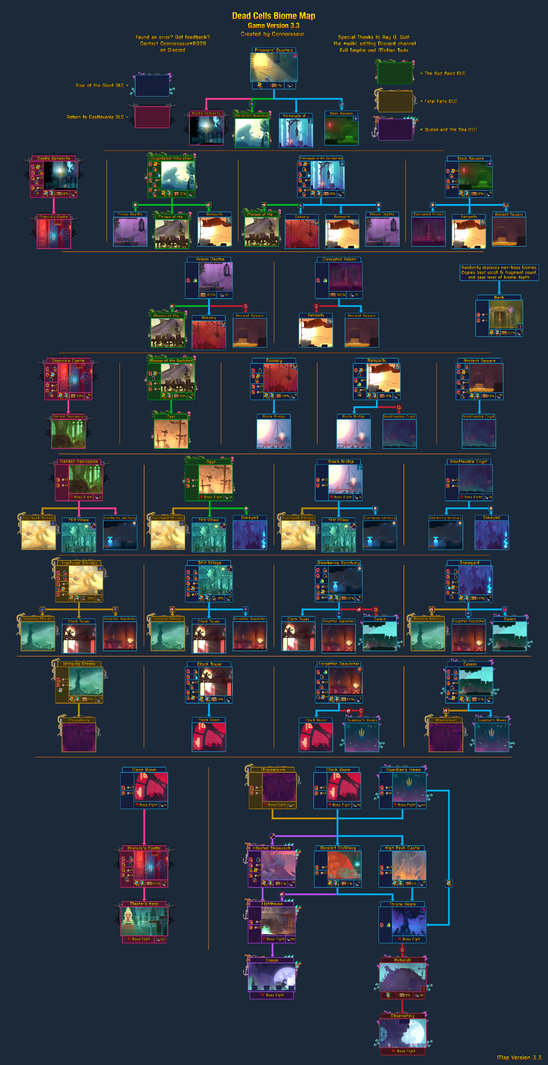
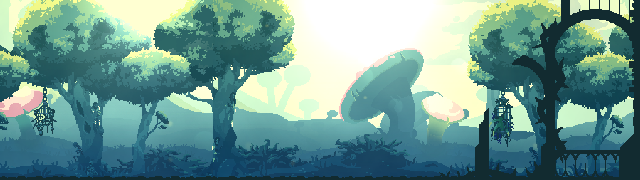
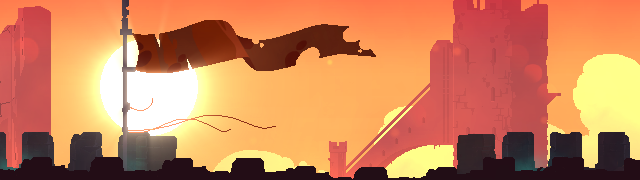
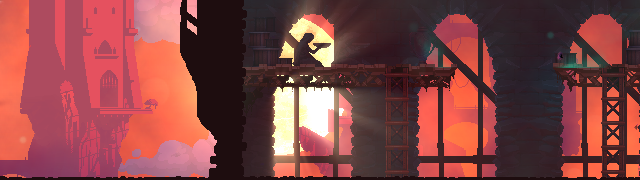
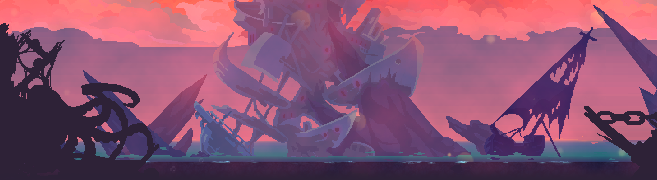
Biomes are the different areas within Dead Cells which players must progress through.[1] The base game currently has 15 main biomes and 4 boss biomes while the DLCs add another 9 main biomes and 8 boss biomes.[2] The order in which biomes are encountered, and the general location of their links, are predetermined but they are divided into levels and only one biome of each level can be accessed in a run which gives players a lot of flexibility and change each run.
Within each run, biomes are procedurally generated within the confines of that biome's set parameters. This puts the focus of gameplay on a combination of on the moment adaptation and memorization, with each biome having a distinct feel.[3]
Each biome also has a set of enemies that the player will encounter, some of them are unique to a specific biome. Higher difficulties change the enemy distribution up.
Scaling and difficulty
Each tier and biome has their own scaling of enemy and trap stats with tiers which operate somewhat differently compared to scaling of player damage and health with Stats. The exact formula used for scaling is not known at the moment but the tiers used for these are, meaning we can determine which biomes are easier and which are harder.
Shops and treasures
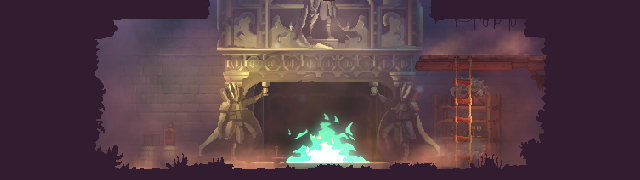
Excluding boss biomes, each biome always contains combinations of shops and treasures. The majority of these are predetermined but their type might be random, shops might be either be a weapons or skills shop and treasure rooms could contain treasure chests, linked altars or very rarely an additional cursed chest. Their locations are always random except for the fact they will always have the same access requirements.
Playing on higher difficulty using collected Boss Stem Cells grants access to boss cell doors which can contain more shops, treasure rooms, or even new exits.
Access and exits
Each biome has exits leading to the biomes of the next level. Some of these can be accessed without any requirement but most are blocked off by rune requirement, which need to be found and unlocked first. The locations of exits in a biome is mostly random, with some exceptions, but are always at the end of hallways or level chunks. They are also seperated, meaning that if there are multiple exits a biome splits up creating different paths depending on the biome.
Additional higher difficulties also unlock new exits allowing new paths.
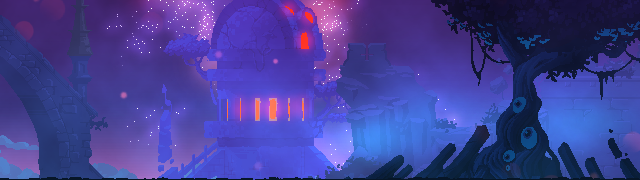
After exiting each biome, the player will enter a Passage. Here, a player can turn in blueprints, spend cells, enter time, killstreak and no-hit doors if the requirements are met, re-roll and upgrade gear, choose and change mutations and replenish their health and health potions. Passages are different depending on which biome is exited and entered, with some of them having secrets.
After exiting a boss biome, the player will enter a special passage which also holds the Blacksmith and a no-hit door.
Map
The player can open a biome map that will show everything the player has explored in the biome. Shown on the map are activated teleporters, shops and treasure rooms. The position of the player is marked with a flaming head, but this is not shown when inside a passage.
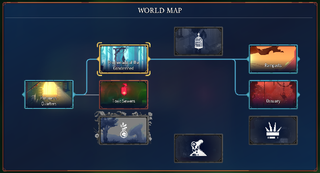
The player can also switch to a world map view, where discovered biomes are shown in color with their names, and undiscovered biomes are shown in gray without their name. A biome counts as discovered when it has been visited once, while an undiscovered biome is shown the moment a biome that can exit into that biome is entered.
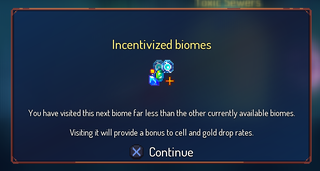
Highlighting a discovered biome will show previously travelled paths between it and biomes of the previous and next tier, while the path used in the current run is indicated by a gray line. Furthermore, the world map will also show the next biome that has the incentivized biome bonus.
First stage
Second stages
Details
|
- Runes Needed to Access:
 Teleportation Rune Teleportation Rune
- Enemy Tier: 3 - 6
- Gear Level: 2
- Scrolls: 1 Power, 1 extra power (1+ BSC), 2 Dual Scrolls, 1 Scroll Fragment (3 BSC), 2 Scroll Fragments (4/5 BSC)
- Enemies: Yeeters,TBS Jerkshrooms,TBS Thornies, Zombies, Bats
- Exits: Morass of the Banished,TBS Ramparts
- Timed Door: 2 minutes
- Hazards: Spikes, carnivorous plants
- Boss Cell Doors:
|
Optional stages
Details
|
- Entrances: Promenade of the Condemned, Dilapidated ArboretumTBS
- Enemy Tier: 8 - 9
- Gear Level: 3
- Scrolls: 1 Power (contained in a Cursed chest)
- Enemies: Zombies, Undead Archers, Slashers, Maskers, Hammers, Sewer Flies (spawned from Hammers), Kamikazes, Lacerators
- Exits: Ossuary, Morass of the BanishedTBS
- Hazards: Spikes, spiked flails
- Boss Cell Doors:
- Keys:
 Iron Cells Key: Give access to 1 of 2 treasure rooms in the end of the biome, each room contains two chained items. Iron Cells Key: Give access to 1 of 2 treasure rooms in the end of the biome, each room contains two chained items.
Can only be accessed via the Promenade of the Condemned and Dilapidated Arboretum.TBS This biome acts as an optional stage between the second and third stages.
|
Details
|
|
Can only be accessed via the Toxic Sewers. This biome acts as an optional stage between the second and third stages.
|
Third stages
Details
|
- Entrances: Toxic Sewers, Promenade of the Condemned, Dilapidated Arboretum,TBS Corrupted Prison (1+ BSC)
- Enemy Tier: 7 - 13
- Gear Level: 3
- Scrolls: 3 Power, 1 extra Power (2+ BSC), 2 Dual Scrolls, 1 Scroll Fragment (3 BSC), 2 Scroll Fragments (4/5 BSC)
- Enemies: Zombies, Undead Archers, Buzzcutters, Inquisitors, Sweepers, Shieldbearers
- Exits: Black Bridge
- Timed Door: 8 minutes
- Hazards: Void
- Boss Cell Doors:
- Keys:
- Runes:
 Customization Rune Customization Rune
|
Details
|
- Entrances: Toxic Sewers (
 Ram Rune required), Corrupted Prison, Prison Depths (1+ BSC) Ram Rune required), Corrupted Prison, Prison Depths (1+ BSC)
- Enemy Tier: 6 - 13
- Gear Level: 4
- Scrolls: 3 Power, 1 extra Power (2+ BSC), 2 Dual Scrolls, 3 Scroll Fragments (3 BSC), 5 Scroll Fragments (4/5 BSC)
- Enemies: Zombies, Festering Zombies, Corpse Worms (spawned from Festering Zombies), Shieldbearers, Disgusting Worms, Kamikazes, Impalers, Sewer's Tentacles
- Exit: Insufferable Crypt
- Hazards: Toxic pools, spikes, spiked flails
- Boss Cell Doors:
- Keys:
 Old Service Key: 3 in total, used to access 3 of the 8 rewards at the end of the biome. Dropped by random enemies. Old Service Key: 3 in total, used to access 3 of the 8 rewards at the end of the biome. Dropped by random enemies.
|
Details
|
- Entrances: Promenade of the Condemned ( Teleportation Rune required), Prison Depths
- Enemy Tier: 7 - 13
- Gear Level: 3
- Scrolls: 2 Power (+1 in a guaranteed Cursed chest), 1 extra Power (2+ BSC), 2 Dual Scrolls, 2 Scroll Fragments (3 BSC), 3 Scroll Fragments (4/5 BSC)
- Enemies: Zombies, Grenadiers, Slashers, Shockers, Thornies, Spawners, Corpse Juices (spawned from Spawners)
- Exit: Black Bridge
- Timed Door: 8 minutes (
 Marksman's Bow blueprint) Marksman's Bow blueprint)
- Boss Cell Doors:
- Runes: Ram Rune
|
Details
|
- Entrances: Dilapidated Arboretum,TBS Promenade of the Condemned ( Teleportation Rune required), Prison Depths
- Enemy Tier: 6 - 12
- Gear Level: 3
- Scrolls: 2 Power (+1 in a guaranteed Cursed chest), 1 extra Power (2+ BSC), 2 Dual Scrolls, 2 Scroll Fragments (3 BSC), 4 Scroll Fragments (4/5 BSC)
- Enemies: Banished,TBS BlowgunnersTBS, Giant TicksTBS, Weaver Worms, Cleavers, Slashers
- Exit: NestTBS
- Boss Cell Doors:
|
First bosses
Fourth stages
Details
|
- Entrances: Black Bridge, NestTBS
- Enemy Tier: 14 - 18
- Gear Level: 4
- Scrolls: 3 Power, 1 extra power (3+ BSC), 1 Dual Scroll, 1 Scroll Fragment (3 BSC), 2 Scroll Fragments (4/5 BSC)
- Enemies: Festering Zombies, Corpse Worms (spawned from Festering Zombies), Weaver Worms, Pirate Captains, Zombies, Kamikazes, Weirded Warriors
- Exits: Clock Tower, Undying ShoresFF (requires reaching the Undying Shores from the Fractured ShrinesFF with the
 Cultist OutfitFF at least once) Cultist OutfitFF at least once)
- Boss Cell Doors:
- Keys:
|
Details
|
- Entrances: Insufferable Crypt, NestTBS
- Enemy Tier: 14 - 19
- Gear Level: 4
- Scrolls: 2 Power (+1 in a guaranteed Cursed chest), 1 extra power (3+ BSC), 1 Dual Scroll, 2 Scroll Fragments (3 BSC), 3 Scroll Fragments (4/5 BSC)
- Enemies: Swarm Zombies, Corpse Flies (spawned from Swarm Zombies), Inquisitors, Catchers, Bats, Kamikazes, Maskers, Rancid Rats
- Exits: Forgotten Sepulcher, CavernRotG (requires the
 Cavern KeyRotG on first exit), Undying ShoresFF Cavern KeyRotG on first exit), Undying ShoresFF
- Timed Door: 19 minutes, 30 seconds
- Hazards: Spikes, spiked flails
- Boss Cell Doors:
- Keys:
|
Details
|
- Entrances: Black Bridge, NestTBS
- Enemy Tier: 12 - 16
- Gear Level: 4
- Scrolls: 1 Power (+1 in a guaranteed Cursed chest), 2 Dual Scrolls, 1 Scroll Fragment (3 BSC), 2 Scroll Fragments (4/5 BSC)
- Enemies: Myopic Crows,FF Stone Wardens,FF Cold Blooded Guardians,FF Slashers, inquisitors, Zombies, Grenadiers, Undead Archers
- Exits: Undying ShoresFF (requires the Cultist OutfitFF on first exit), Clock Tower
- Hazards: Pits, rotating axe, swinging log, Myopic CrowsFF
- Boss Cell Doors:
|
Fifth stages
Details
|
- Entrances: Stilt Village, Slumbering Sanctuary, Fractured ShrinesTQatS
- Enemy Tier: 19 - 23
- Gear Level: 5
- Scrolls: 4 Power, 1 extra power (4+ BSC), 2 Dual Scrolls, 2 Scroll Fragments (3 BSC), 3 Scroll Fragments (4/5 BSC)
- Enemies: Dark Trackers, Cannibals, Bombardiers, Undead Archers, Automatons
- Exit: Clock Room
- Hazards: Spikes, spiked flails
- Boss Cell Doors:
- Keys:
|
Details
|
- Entrances: Stilt Village ( Teleportation Rune required), Slumbering Sanctuary, Graveyard, Fractured ShrinesFF ( Teleportation Rune required)
- Enemy Tier: 19 - 23
- Gear Level: 5
- Scrolls: 3 Power (+1 in a guaranteed Cursed chest), 1 extra power (4+ BSC), 2 Dual Scrolls, 3 Scroll Fragments (3 BSC), 4 Scroll Fragments (4/5 BSC)
- Enemies: Dark Trackers, Inquisitors, Lacerators, Cleavers, Kamikazes, Shockers, Corpulent Zombies
- Exits: Clock Room
- Timed Door: 26 minutes
- Hazards: Spikes, darkness
- Boss Cell Doors:
- Keys:
 Crypt Key: There are 2 of them, each leading player further in the level. Crypt Key: There are 2 of them, each leading player further in the level. Moonflower Key: The third one. Hidden behind some foliage. Moonflower Key: The third one. Hidden behind some foliage.
- Runes:
 Explorer's Rune Explorer's Rune
|
Details
|
- Entrances: Graveyard ( Cavern KeyRotG required on first entry), Slumbering Sanctuary (2+ BSC and kill the GiantRotG at least once)
- Enemy Tier: 20 - 24
- Gear Level: 7
- Scrolls: 4 Power, 1 extra power (4+ BSC), 2 Dual Scrolls, 4 Scroll Fragments (3 BSC), 5 Scroll Fragments (4/5 BSC)
- Enemies: Ground Shakers,RotG Inquisitors, Arbiters,RotG Demons, Lacerators, Slammers, SkeletonsRotG
- Exits: Guardian's Haven,RotG MausoleumFF
- Hazards: Pools of lava, lanterns, spikes, spiked flails, electric waves
- Boss Cell Doors:
- Keys
 Garland Key:RotG Gives access to the 4 BSC door which contains the blueprint of Garland Key:RotG Gives access to the 4 BSC door which contains the blueprint of  Festive Outfit.RotG Look for a vine passage in the ceiling, often near a shop. Festive Outfit.RotG Look for a vine passage in the ceiling, often near a shop.
|
Details
|
- Entrances: Fractured ShrinesFF ( Cultist OutfitFF needs to be equipped on first entry), Stilt Village, Graveyard.
- The latter two entrances are available after the entrance in the Fractured ShrinesFF has been unlocked.
- Enemy Tier: 19 - 23
- Gear Level: 6
- Scrolls: 4 Power, 2 Dual Scrolls, 3 Scroll Fragments (3 BSC), 4 Scroll Fragments (4/5 BSC)
- Enemies: Apostates,FF Failed Homunculi,FF Compulsive Gravediggers,FF Clumsy Swordsmen,FF Dastardly Archers,FF Grenadiers, Bats
- Exit: MausoleumFF
- Hazards: Pits
|
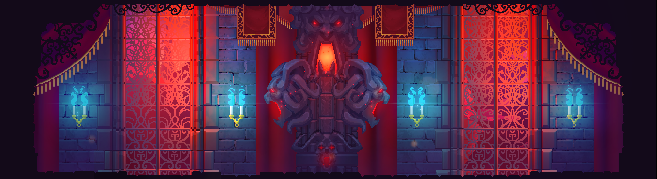
Second bosses
Sixth stages
Details
|
- Entrances: Clock Room, Mausoleum,FF Guardian's HavenRotG
- Enemies: Guardian Knights, Lancers, Undead Archers, Bombardiers, Royal Guards
- Enemy Tier: 24 - 27
- Gear Level: 6
- Scrolls: 2 Power, 2 Dual Scrolls, 1 Scroll Fragment (3 BSC), 2 Scroll Fragments (4/5 BSC)
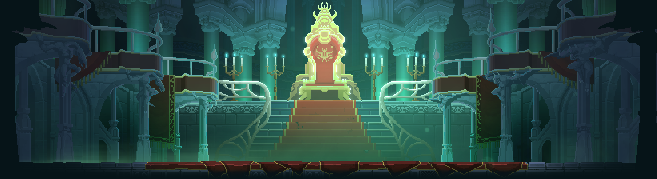
- Exit: Throne Room
- Hazards: Spikes, spiked flails
- Doors:
- Castle Key Doors: They are 6 doors of 3 different colors, 2 doors each. Each 2 doors lead to an extra section of the biome, which offers an Elite enemy fight and a Castle Key as reward.
- Keys:
 Castle Key: 3 in total. 2 are required to access Throne Room, while the 3rd gives access to blueprint of Castle Key: 3 in total. 2 are required to access Throne Room, while the 3rd gives access to blueprint of  Boomerang and a Scroll of Power. Dropped by the three Elite enemies in each of the Castle Key doors. Boomerang and a Scroll of Power. Dropped by the three Elite enemies in each of the Castle Key doors.
|
Details
|
- Entrances: Clock Room, Mausoleum,FF Guardian's HavenRotG
- Enemies: Living Barrels, Infected Workers, Demolishers, Shieldbearers, Rancid Rats, Lacerators, Spawners, Corpse Juices (spawned from Spawners)
- Enemy Tier: 17 - 21
- Gear Level: 6
- Scrolls: 2 Power, 2 Dual Scrolls, 1 Scroll Fragment (3 BSC), 2 Scroll Fragments (4/5 BSC)
- Exits: Throne Room, LighthouseTQatS
- Hazards: Exploding barrels, Spikes
- Doors: There is a locked door blocking the exit to the Throne Room requiring the Distillery Key.
- Keys:
 Distillery Key: Gives access to the Throne Room. Can be found behind a destructible wall, which can only be destroyed by deflecting a nearby exploding barrel or by using the Distillery Key: Gives access to the Throne Room. Can be found behind a destructible wall, which can only be destroyed by deflecting a nearby exploding barrel or by using the  Barrel Launcher. Barrel Launcher.
|
Third bosses
Seventh stage
The following information contains spoilers regarding the true ending of the game. Discretion is advised.
- Entrance: Throne Room (5 BSC)
- Enemy Tier: 37 - 46
- Gear Level: 10
- Scrolls: 2 Dual Scrolls
- Enemies: Bombers, Defenders,RotG Failed Experiments, Magistrates of Death,RotG Screaming SkullsRotG (spawned from Magistrates of Death), Slammers, LibrariansRotG
- Exit: ObservatoryRotG
- Hazards: Electric waves, projectiles, spikes, void, pools of lava
- Keys:
Fourth bosses
The following information contains spoilers regarding the true ending of the game. Discretion is advised.
Special stages
Details
|
- Entrances: Any transition that does not lead to a boss.
- Enemies: Agitated Pickpockets, Gold Gorgers, Golden Kamikazes, Mimics
- Enemies that spawn in this biome depends on what biomes it replaces.
- Enemy Tier:
- Gear Level:
- Scrolls: The Bank will contain one less scroll than the "best" biome that's being replaced, i.e. the one with the most scrolls. The lost scroll is replaced by a cursed chest.
- Exit:
- Hazards: Spikes, spiked flails
- Doors:
- Bank floors: There three floors in the bank that are blocked by locked doors. Each needs a pass of matching color to unlock.
- Keys:
|
Unused stages
An inaccessible stage that was a prototype for the Forgotten Sepulcher, the entrance was behind a door in the Graveyard that required 5 boss cells to open. This door was impossible to open normally as it was removed before the Rise of the Giant DLC added the fifth boss stem cell. If accessed via modifying the boss cell counter with third-party tools, the stage could be seen with unique lighting very similar to what the Forgotten Sepulcher currently has, although it did not decay akin to how the darkness mechanic currently works. The only enemies present in the stage appeared to be Cannibals. The enemy tier also appeared to be absurdly high, making them very hard to deal with due to their large HP and damage values. The majority of the stage was locked behind a door that required a key (simply named "Key") to open, which had no corresponding item ID and thus couldn't be spawned, even by third-party tools.
This stage is irrelevant to the  Architect's Key.
An old ending point of a run that persisted until the 1.0 update came around. It would be accessed after defeating the final boss of the game, which at first was Conjunctivius, then the Time Keeper, and finally, the Hand of the King. It used to have the Fisherman NPC right next to a boat, who would impale the Beheaded with a tentacle to let the player start a new run. Later on, that was changed to a "Work in Progress" sign and a tube, through which the Beheaded would crawl to go back to the Prisoners' Quarters. Its assets have now been repurposed for the area leading to the Infested Shipwreck.TQatS
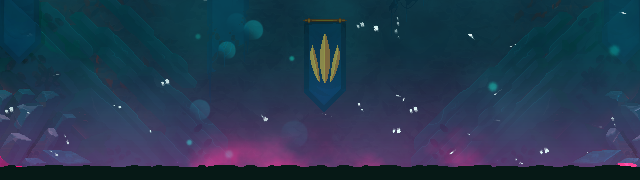
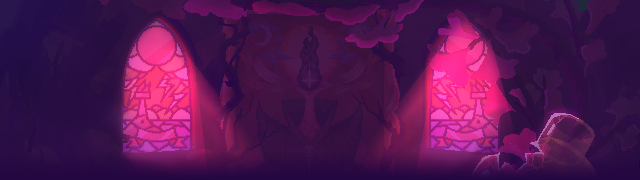
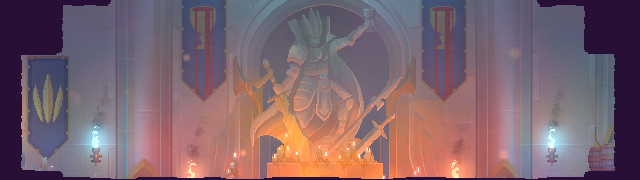
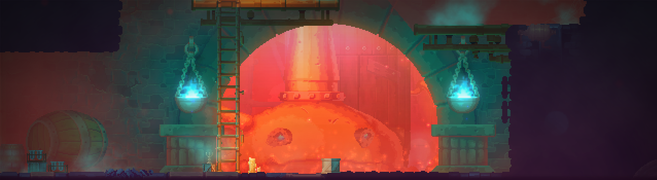
Gallery
The world map partially explored.
Incentivized biome pop-up.
References