The Queen
The Queen is an alternative final boss to the game. She resides in the Crown at the top of the Lighthouse. She is exclusive to the Queen and the Sea DLC.
Moveset
In 1+ BSC, the Queen's first phase will include a special attack at the end of the 3-hit-combo.
Movement
The Queen can slide forwards and backwards to close distance or back away from the players attack.
Normal Attacks
Stab
|
Lower Stab
|
Slash
|
Special Attacks
The Queen has 9 special attacks, most of which are used at the end of a combo or during an enrage phase.
Fire Sword
|
Fire Wave
|
Fire Tornado
|
Fire Aura
|
Grab and Throw
|
Down-Strike
|
Ground Slam
|
Dashing-Strike
|
Taunt
|
Defensive Counter Attacks
The Queen can use a wide array of abilities to counter the player’s attacks and abilities.
Fire Tornado
|
Down-Strike
|
Banish Summon
|
Turret Execution
|
Splitting Grenades/Thrown Deployables
|
Melee Parry
|
Deflect Projectiles
|
Reality Slashes
The Queen will move to the middle of the arena, elevate into the air, laugh menacingly and initiate this attack. These are screen-wide attacks that indicate a change in the Queen's phase.
Reality Slash (5x)
|
Reality Slash (10x)
|
Reality Slash (30x)
|
Mechanics
Combos
The Queen doesn’t randomly use her normal & special attacks, they have a set pattern! A sequence consists of her three normal attacks in a random order, but the same sequence will be applied to the whole combo (If she uses her Slash first, then it will be used on the 4th, 7th, and 10th attacks). After the combos have been executed, the Queen will usually add a special attack before returning to a defensive stance.
- This can be taken advantage of, if she uses the Slash first, then you know that her two next attacks won't be a Slash.
- Combos that are merged together (e.g. a combo of 6), will have multiple groups of three. The order of the attacks from the first combo carries over to the second combo.
- During a combo, she will usually dash to you before an attack.
- In her later phases her dashes will happen more frequently & hectically.
- After a combo, she can use one out of her 9 special attacks.
Phases
- Phase 1:
- She will use 3 attacks and on 1 BC+ add a special attack to the end of the combo.
- Phase 2:
- She can now use the Dashing-Strike instead of executing her regular combos.
- The pauses after her combos are finished will now be shorter.
- She will use 3-6 attacks and can add a special attack to the end of the combo.
- She can execute 2 combos back to back with no pause in between.
- Phase 3:
- The pauses after her combos are finished will now be very short.
- She will use 3-7 attacks and can add a special attack to the end of the combo.
- She can execute 3 combos back to back with no pause in between.
- This can lead to the Queen using 12+ normal attacks in a row during this phase (the most I have seen)
- Phase 4:
- The pauses after her combos are finished will now be even shorter.
- She will use 3-9 attacks and can add a special attack to the end of the combo.
- She can execute 5 combos back to back with no pause in between.
Enrage
When does the Queen Enrage?
- The Queen will enrage if you either parry her too much, throw her off the cliff too often, interrupt her attacks too often or deal too little damage.
- During an enraged phase the Queen will use as many different special attacks as possible.
- Some attacks can be used twice.
- She can enrage multiple times in a row.
- If interrupted during an enrage, she can still continue her special attacks.
Phase differences
- Phase 1:
- She will use 3-4 special attacks
- Phase 2:
- She will use 3-5 special attacks
- Phase 3:
- She will use 3-7 special attacks
- Phase 4:
- She will use 3-8 special attacks
Knockback/CC
- You can interrupt her attacks, these items can knockback/pull/interrupt her:
 Assault Shield (disrupt + movement)
 Knockback Shield (can interrupt all of her parry-able attacks)
 Grappling Hook (disrupt + low cooldown)
 Wave of Denial (disrupt + low cooldown)
 Mushroom Boi! (disrupt + knockback)
- She has strong knockback resistance.
- You can make The Queen fall into the void.
- This damages her a bit, but she will have a force shield for a second after teleporting back to the platform.
- She can teleport back to the stage before getting damaged if done too often.
- She will attack (normal/special attack) almost instantly if she teleports back to the stage without taking damage.
- Will enrage her if done too often.
- This damages her a bit, but she will have a force shield for a second after teleporting back to the platform.
- You can use her Dashing-Strike in your favour:
- You can make her dash into the void by standing very close or jumping outside of the arena before she lunges at you.
- Parrying her Dashing-Strike will knock her back, which can result in her falling off the cliff (she must be closer to the edge than you are).
Revive
- This can only happen once during the fight and only while the Queen is above 50%.
- The Queen will revive you after the death screen pops up. Your body won't vanish, instead, it will float towards the Queen.
- You will be healed back to 100% (your flask amount won't change) and the Queen will lose 10% of her total HP while reviving you.
- This can be taken advantage of in order to receive a free heal and reduce the Queen's HP by 10%.
Strategy
General
Even though the Queen is complicated as she is, the fight is relatively simple. You just have to make sure that you prepare well enough in the Biome before the Servants so that you can deal with the two boss stages back-to-back. Because both fights are fast-paced, you can use one build for both of them! Any form of CC helps with interrupting them, but that will make the no-hit harder. If you are going for the no-hit, use a build with a lot of damage and focus on dodging (this is also the easiest way to beat her, just get so much damage that she's stuck in her Reality Slashes). Though, if your only goal is to beat the Queen, then make sure you are adjusted to her speed. Counting the number of her attacks during normal combos or her enraged phase is a good idea, you could then predict when she will stop her attacks
Combos
Dodging her normal combos is relatively straightforward, all you need to do is run away from the Queen and roll when she attacks. That way you’ll be able to dodge her combos, even in her final phases! But if you want to deal damage during her normal combos, be ready to parry her attacks or time your rolls very well to dodge every normal attack of hers, though be prepared for her Down-Strike and the melee counter! Remember that she will dash to you before attacking, but sometimes she also attacks without dashing in her earlier phases and sometimes she dashes twice without attacking in her later phases! Sound cues are great to distinguish between her normal combos, her defensive counters and her Dashing-Strike!
Defensive Counters
Before you start the fight, make sure to check your loadout, some of your weapons might force out some counterattacks! Think about all the possibilities, if you have a weapon with projectiles, will you then dodge her counter or are you going to parry it? If you have a pet, are you ready for dealing enough damage to stop her from banishing it? If you have fire/oil/toxic clouds, are you ready to dodge roll her Fire Tornado that counters it? Etc.
Enraged Phases
The Queen will enrage during the fight, either from receiving too little damage, being pushed off the cliff too often, getting parried too often or getting interrupted/cc’d too often! During her enraged phases, you should only focus on dodging her attacks because sometimes you can get pinched between two special attacks. Some of her attacks can get interrupted, some can be parried and some can be jumped, but there is no answer to every attack of hers! You will need to learn the dodging strategy for the attacks.
Reality Slashes
Her Reality Slashes are a good opportunity to dish out a lot of damage, but be careful if you are using melee weapons! Sooner or later the Slashes will prevent you from getting close to The Queen. And if you move around too much during her Slashes (notably during her 2nd transition Slash), then you will run out of space, so move only a bit every time and be efficient with the space you use to dodge this attack. If you deal enough damage to her before she enters a Reality Slash and if you then keep damaging her enough, then the Queen will transition from her 1st Reality Slash into her 2nd & 3rd Reality Slashes! This can easily be done with builds that are primarily focused on only dealing damage.
Interrupting
If you interrupt her attacks too often, be prepared to face her enraged phase. But if you can deal with the barrage of attacks during the enrage, then interrupting her attacks is a great way to stop her combos to deal more damage. But be warned, the general concept of using interruption & cc isn’t helpful when trying to do a no-hit, because this can change up her combo and leave you with having to guess what comes next instead of being able to just count her attacks and counter them.
When to heal
The best time to heal is either during her Taunts or shortly after her Dashing-Strike, during these periods you’ll be able to drink a potion even without using ![]() Emergency Triage! Also, it is highly recommended to not heal during her combos or enraged phases. Rather focus on dodging instead of trying to heal or dealing damage. Besides that, trying to force a revive is a great way to receive a full heal while damaging the Queen for 10% of her HP, but you’ll have to do that while the Queen has more than 50% HP!
Emergency Triage! Also, it is highly recommended to not heal during her combos or enraged phases. Rather focus on dodging instead of trying to heal or dealing damage. Besides that, trying to force a revive is a great way to receive a full heal while damaging the Queen for 10% of her HP, but you’ll have to do that while the Queen has more than 50% HP!
Weapons/Skills
- The
 Meat Skewer and Assault Shield will move you out of the way of most of her attacks before they reach you or give you a long parry time, allowing you to continuously attack with little risk of damage.
  Phaser is an easy way to get behind her and dodge most of her attacks.
- Turrets can be used for damage and even as a distraction as she will try to destroy them, leaving her vulnerable to attacks.
- Most of her attacks are close-ranged and rely on her ability to close distance quickly. Any item that can lock her in a place like
 Root Grenade or
  Wolf Trap will prevent this, giving an advantage to ranged builds.
Lore
Not much is known about the Queen, or what relationship she held with the King before the Malaise beyond being married to him; she is implied to have owned the Shrines, which contained vaults filled with treasure and led the Pagans. It would be assumed, that she and the Royal Gardener had a close relationship before the Malaise. This is evident in various notes left by the Gardener such as: seeking help from the Pagans and attempting to reach the Lighthouse where she resided. Although he did not succeed as he was transformed into the Scarecrow.
Like the Beheaded, the Queen was turned into a homunculus with a "head" that has three marks resembling the King's coat of arms and a halo; compared to the Beheaded having just one mark. A room in the Undying Shores implies she was turned into a homunculus by the Apostates and was freed by the Servants. After this transformation she fled to the top of the Lighthouse, stopping anyone that tried to light the beacon to contain the Malaise.
Dialogue
First meeting
- "Here comes the interloper. After all the Malaise has done to the kingdom, you should realize that we cannot allow anything to leave the island. But I guess you're beyond reasoning now."
- "I'm sorry, but I have to stop this folly right here, right now. Know that I won't take any pleasure in killing you."
Shielding
- "Enough with this!"
- "Stop hiding!"
- "Try parrying this..."
- "Fight for real now!"
Taunts
- "Is that all you got?"
- "Hey, you left your liver here."
- "Pathetic..."
- "Run away. Now."
- "Shall I send you back?"
Queen falls in the void
- "Stop that!"
- "You'll pay for that!"
- "That was not pleasant."
- "What a clever use of your environment, you should be proud."
Premature dead
The Queen reacts to the death before reviving the Beheaded.
- "Oh no you don't!"
After the Queen recovered the Beheaded's corpse and is about to revive him.
- "I'm not done with you."
After the Queen revived the Beheaded:
- "Now fight. For real, this time."
When defeated
- "I guess... the die is cast then..."
Second meeting
- "You again... so stubborn."
- "En garde!"
Gallery
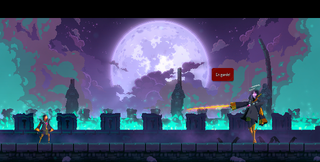
The Queen atop the Crown, challenging the Beheaded.

History
Bosses
| |
|---|---|
|
|